Monday, December 7, 2020

Roasted Chestnuts, Nut Roast en Croûte , Greek Green Beans Eggplant Stacks, Roasted Beets,

Roasted Chestnuts 
No open fire?  You can still roast chestnuts for the holidays and holiday dishes -- in your oven.  Chestnuts are not cheap, but they are good value because a little goes a long way.

Chestnuts
Oven
Sharp Knife

Preheat the oven to 425F.

With a sharp knife cut an X through the skin in the rounded part of each chestnut.  This critical step keeps the nuts from exploding from internal pressure as they roast!  Place the nuts on a pan, and roast them 15-20 minutes until the Xs peel open and the meats are softened.  Time will vary depending on the nuts themselves. 

Remove the roasted nuts to a kitchen/tea towel.  Wrap them up and squeeze hard.  The nuts should crackle, loosening the crisped shells.  Let them set for a few minutes to cool.  Then pull, snap, and remove the dark skin and another, papery, skin between the outer skin and the nut.

Roasted peeled nuts will last in the fridge for a few days in an airtight container.  To store for a week or more, put them in a breathable container, or freeze them.  So what am I going to do with my roasted Chestnuts?  Look here:

Nut Roast en Croûte 

Best dish I have made in a long time!!! 

From Michelle at
The Last Food Blog, recommended by our friend Fiona Barnes. To make this great recipe, you'll either need a package of frozen pre-made dough or a batch of Shortcrust Pastry (see below) which is simple and cheaper to make than to buy.   I made this beauty in my Ninja Flip Air-Fry Oven:

Filling Ingredients
1 tbsp EVOO
1 Onion diced
2 Carrots peeled and diced
8 oz Mushrooms chopped
¾ lb Butternut Squash cubed
3 cloves Garlic minced
1 Tbsp minced Rosemary
1/2 Tbsp dried Oregano
1/2 Tbsp Sage
6 oz Mixed Nuts – walnuts, almonds, cashews
6 oz chopped roasted Chestnuts
1 large Egg
3 oz Feta cheese
1 tsp cracked Black Pepper
½ cup Breadcrumbs

Preheat the oven to 400F. Lightly grease a baking tray with olive oil,  or lay down a sheet of parchment paper.

In a large pan sauté the onion and carrot until  soft. Add the mushrooms, squash, salt and pepper and cook for about 10 minutes. Now add the garlic and herbs and crumble in the chestnuts. Cook for about 5 minutes more then take it off the heat and leave to cool.

While the mixture is cooling, toast the nuts in a large frying pan for about 5 minutes. Whirr them in the food processor to get a rough crumble. Add the nuts to the squash and mushroom pan.  This can even be done the day before and refrigerated overnight...

Now, add the breadcrumbs, feta and egg to the mixture and mix well. Reserve.

Roll the  pastry out into a 10" x 13" rectangle on a piece of waxed paper.. 

Put the filling onto the pastry and shape it into a “sausage”, leaving room along the edges -- enough room for the pastry to fold over. 

Fold the pastry over the filling, then fold up the ends. Turn the en croûte upside down onto the baking tray.

Brush the pastry with the milk then place on the middle shelf in the oven for 40-45 minutes, turning the tray around halfway through cooking.  

Let it rest a few minutes before slicing and serving.

Shortcrust Pastry
This classic recipe is used for all sorts of things -- tart crusts, en croute, and much more...  This recipe makes a nice slab of dough about 10 x 13.  The secret to good shortcrust (especially here in Florida) is to keep everything cold -- pre-chill the mixing bowl, ice cubes floating in the water, really cold butter, cold hands... the works.

2-1/4 cups AP Flour
2/3 cup Butter or Margarine -- I use Oliviotm
Pinch of Salt
6 Tbsp Ice Water

I mix the flour and salt in the mixing bowl then chill that for 15 minutes.  Quickly measure and cut in (with your cold hands) the butter.  Then add the water a tablespoon at a time while stirring with a fork. 

Continue stirring and the dough will come together in clumps.  Mash it all together, in the cold bowl, until you get a lump of dough, wrap that in clingfilm and return to the fridge for a 15 minute chill-down before rolling out.

Greek Green Beans
I had a huge batch of green beans, as well as a partial basket of cherry tomatoes that needed to be used up.  This is a good thing to do to them...

1 to 1-1/2 lbs Green Beans topped & tailed
1 Onion sliced into strips
18 Cherry Tomatoes, halved
4-6 cloves Garlic, chopped
1/4 cup Marinara or 1 Tbsp Tomato paste
2 cups Vegetable Broth + 2 cups Water
Dried Basil, Rosemary, Oregano and Sage to taste -- at least 1/2 tsp of each

Saute the onions in a splash of EVOO for a couple minutes, then add the green beans, garlic and a dash of each spice.  Add the broth and water.  Cover and simmer for 15-20 minutes until the beans are getting tender.  

Now add the marinara sauce and cherry tomatoes and continue simmering, uncovered until the liquid reduces and thickens.   Taste and adjust the spices as needed.

Eggplant Stacks
I found this giant round eggplant at a farmer's market the other day, and for $1,  I couldn't pass it up.  

We both love a simplified version of Eggplant Parmesan which I make, that we call  Eggplant Stacks.

Eggplant  sliced into 1/2" to 3/4" thick rounds
Greek or Italian seasoning, to taste
Parmesan Cheese
Shredded Cheese
Slices of Tomato and Onion
Panko or other breadcrumbs
Marinara Sauce of your choice

Drizzle the eggplant rounds with EVOO and dust them with seasoning.  Broil on both sides until just beginning to brown.  You don't want them cooked mushy.

Stack slices of grilled eggplant with layers of sliced onion, tomato, a dusting of Parmesan and panko in between along with a couple spoonfuls of marinara.  A good stack is 3 slices of eggplant.   Top each stack with additional tomato, onion, breadcrumbs, and shredded other cheeses.   Bake or broil a few minutes to melt the cheeses, and serve!  

Brit Pickled Beets
We got some HUGE beets in our produce box.  

Sally has only ever had British style pickled beets, not American, so I decided to try and replicate them.  The difference is in the vinegar and spices.  Most British pickled beets use malt vinegar, not white vinegar, seldom any sugar,  and minimal spices.  American pickled beets are significantly sweetened and use dry mustard and white vinegar.

I chose to roast my beets peeled and cubed rather than whole.  IMHO the "red menace" of juice and such is easier to clean up when raw rather than cooked.  At least there seems to be less of it to clean up!


To make a pint of pickled beets:

2 cups peeled cubed, roasted Beets
1 cup Malt Vinegar (just like you use for fish & chips)
1/2 tsp Pickling Salt (very fine grain, no anti-caking agents or iodine additives)
1 tsp Whole cloves 
1 tsp Whole Peppercorns
1/2 tsp Horseradish

In the bottom of your screwtop jar, place the herbs & spices. Now pack in the still warm beets. 

Warm but don't boil the vinegar, and whisk in pickling salt.

Pour the warm vinegar over all, to within 1/2" of the top.  Screw on the top and let it cool on the counter for a couple hours.    

For best results, store in the fridge for a couple days to a couple of weeks before sampling.  This gives the beets a chance to absorb the flavors.


Friday, November 27, 2020

Foodie Books, Sunshine Lemon Pie, Potato Gratin, Cranberry Mold, Decker Family Cheesecake

Florida Sunshine Lemon Pie
One of my blog followers turned me on to this recipe, and I just had to give it a try.  This is not yo Momma's Lemon Meringue Pie!

1 large Lemon
1/2 to 1 cup Sugar -- to taste
1/2 cup Butter
4 Eggs
1 tsp Vanilla extract
Unbaked pie crust

Pre-heat oven to 350F.

Chop the lemon into fingertip-sized pieces -- skin, and pith (but no seeds), and juice.  Put the lemon, butter, egg and vanilla in your food processor and take it for a nice long spin. Stop after a minute or so, taste, and add sugar, spin and taste until you get your personal level of tart vs sweet.  How much sugar depends on your taste buds and the lemon.  I didn't get ours quite sweet enough, but it was still really tasty.  Keep spinning until the mixture is fairly smooth and runny.  

Pour into the crust and bake 30 minutes or until it is slightly brown and doesn't jiggle.  

I baked it my new Ninja AirFry Flip Oven,  from Sally's Mum.  Doesn't heat the whole darn kitchen!!

Serve with whipped cream if you want.  Easy peasy lemon squeezy!

Presidential Potato Gratin
Hail to our new Chief!  Here's a presidential and foodie-book related recipe, from Recipes From The Presidental Ranch by Matthew Wendel, former Personal Chef to President GW Bush, who cooked for the Bush's from the Texas Governor's Mansion to the White House.

1 to 1-1/2 lbs Yukon Gold Potatoes
1 to 1-1/2 lbs  Sweet Potatoes
1-1/2 cups shredded Gruyere (I used an Italian 5-cheese blend which I had on hand)
1-1/2 Tbsp minced fresh Rosemary or other herbs  I used Basil and Oregano
1-2 cloves Garlic, minced
3/4 cup Heavy Cream
S&PTT

Preheat oven to 450F.

Peel and thinly slice the potatoes and sweet potatoes.  If you have a mandolin or food processor with a slicing blade that would be perfect.

In a 9x9 baking dish alternate layers of white and sweet potatoes, with sprinkles of cheese, rosemary, salt and pepper.  Combine the cream and minced garlic and pour overall, then top with a last blast of cheese.  Bake. covered, for 45-60  minutes until potatoes are tender.

DIY Cranberry Sauce Mold
In days of yore, I liked, but didn't love cranberry sauce -- you know -- that stuff in a can.  Then a few years back I was introduced to real cranberry sauce!  Black & White.  Night and Day.  This stuff is fabulous!

1 lb fresh Cranberries
1 cup Sugar
Zest of 1-2 Oranges
2 Tbsp OJ Concentrate or 2/3 cup Orange Juice
1-1/4 cup water (or 2/3 cup if using liquid orange juice) 
1 packet of unflavored Gelatin
optional pinch of salt

Prepare your mold with a bit of non-stick spray.

Put everything but the gelatin in a pot and bring to a boil, stirring to dissolve the sugar.  In a cup, stir the gelatin in a couple tablespoons of water and reserve.

After 10-15 minutes, the cranberries will have popped.  Take them off the heat.  Take about half a cup of the hot liquid and slowly stir it into the dissolved gelatin.  Then pour that into the cranberry mixture and stir.  Ladle that into your mold and cool at room temp.  Then cover with clingfilm and refrigerate at least 8 hours before serving.

To unmold, warm the mold for a minute or two in a bowl of warm-to-hot water that almost reaches the brim of the mold.  Run a thin knife around the edge of the mold, put a plate on top and flip over to release the gelatin from the mold.  

Some folks tart their mold up with bits of fruit, nuts, marshmallows, creamy this-and-that.  I'll take mine plain please.

Decker Family Cheesecake
This recipe comes from Holly's paternal grandma, Bea Decker, who lived to more than 90 years of age.  This has been a feature of family holiday parties for perhaps 50 years.  Not your usual custard with fruit topping cheesecake, but an almost savory dessert.  Makes 2 standard 9" pies.

Pre-heat oven to 375F.

8 oz Evap Milk
1 large carton Cottage Cheese
4 Eggs
4 Tbsp Flour
1 Tbsp Lemon Juice
1 tsp Vanilla Extract
2 pre-made Graham Cracker Crusts
1-2 cups crushed Graham Crackers
1-2 cups crushed Walnuts

Mix first six ingredients together in a large bowl. Pour into crusts.

Spread crushed Graham crackers and walnuts on tops.

Bake at 375F for 15 minutes. Reduce temperature to 345F and bake an additional 35-45 minutes until a knife blade comes out clean.  


Foodie Books
Looking for the perfect Holiday gift?  These two books are absolutely fabulous.  Not cookbooks as such, but great writing and good stories with some pretty perfect recipes.  I highly recommend these if you love both great writing and good food!

The Last Chinese Chef by Nicole Mones
As Amazon says "...will forever change the way you look at Chinese cuisine and culinary culture. You may know Chinese food; you may even love it. But The Last Chinese Chef will take you into a world of Chinese food you never even knew existed. Here is the hidden universe of one of the world's great cuisines. Its philosophy, its concepts, and its artistic ambitions are all illuminated in a story that's entertaining, emotionally satisfying, and erudite.

The Debt To Pleasure by John Lanchester
In the body of the text, the author describes his novel perfectly:  "...gastro-historico-psycho-autobiographic-antropico-philospohic-lucybrations"!    As Wikipedia says:  "...a skillful and wickedly funny account of the life of a loquacious Englishman named Tarquin Winot, revealed through his thoughts on cuisine as he undertakes a mysterious journey around France. The revelations become more and more shocking as the truth about the narrator becomes apparent.


Wednesday, November 18, 2020

Favorite Things, Lemon Curd, Victoria Sandwich, Green Bean Mushroom Casserole, Soup


Lemon Curd
It's been five years since I made and wrote about my first microwaved lemon curd experiment.  High time to bring it back again.  Especially as it's Meyer Lemon season here in Southwest Florida, and they have the highest juice content of all the lemon varieties.  This recipe also works with other citrus fruits alone or in combination.  

If you make curd the old stove-top way, it's a lot of standing around and stirring -- I mean half an hour or more.  Microwave style is a lot like my microwave marmalade, and you're done in 10 minutes or so.

1 cup fresh squeezed Meyer lemon juice (or the other kind if you can't get Meyers)
1 cup Sugar
1/2 cup Butter, melted
3 Eggs, beaten
zest of 3 of the lemons, before you juice them, 1/4 to 1/3 cup

In a microwave safe bowl, whisk together the sugar and eggs until they are very smooth.  Add the juice, zest and butter and whisk some more. 

Microwave on High for 1 minute.  Stir.  Repeat...and repeat.  After 3-10 1 minute blasts, the mixture will have thickened until it will coat the back of your stirring spoon.  Time depends on your lemons and your microwave.  Ladle into screw-top jars and refrigerate after cooling, for up to 3 weeks.


What good is Lemon Curd??   See that Victoria Sandwich cake up at the top of the page??  That!! 

Plus... Lemon pie, lemon tarts, schmeared on crumpets, toast or scones, as a cake topping, filling for fruity pocket pies... you name it!

Old School Layer Cake
So, there I was with all that wonderful Meyer Lemon Curd.  Something else I haven't done in a long time is make a cake from scratch rather than a box mix.  Here's a Victoria Sponge cake, named after Queen Victoria, with nice thick layer of Lemon Curd between the two layers.  This recipe is from the  Great British Bake Off How To Bake cookbook which our English friends Fiona & Toby gave me a couple years back when they came to visit.

To make this cake even more "olde school" I decided to use just a wooden spoon to beat things into shape  -- sorta Downton Abbey!

1 cup unsalted Butter, softened to room temp
1 cup Sugar
4 Eggs, beaten
1 cup Self-Rising Flour, sifted to get air and reduce lumps
1 Tbsp Milk at room temp

Pre-heat the oven to 350F.  While that's going on:

Beat the room temp butter for a minute or two until smooth and creamy.   Gradually add the sugar while beating with each addition -- another 3-4  minutes until the mixture get almost white and fluffy.  Be sure to scrape down the sides as you go.  Add the vanilla extract too.

Now add the beaten eggs a bit at a time, beating and scraping down as you go.  This should take about 5 minutes.

Lastly, sift the flour a second time as you fold it into the mixture, as lightly as possible to give the mixture as much air as you can.

Spoon the mixture equally into two 8" baking tins  which have been sprayed all around or given a parchment bottom and greased sides.

Bake for 20-30 minutes until golden as springy to the touch.  Test for doneness with the ubiquitous toothpick.


Cool the cakes.  Then put one cake upside down on your cake plate, and spread on a nice thick layer of Meyer Lemon Curd (or your favorite strawberry or other berry jam).  
Set the second cake, crust side up, on the first layer.  Dust with confectioner's sugar, or add more jam, or fresh berries.  Slice and serve with a dollop of whipped cream if you want, but this is plenty decadent as it is.

Mushroom -- Green Bean Casserole
This recipe is based loosely on a Forks Over Knives recipe, but my gravy is healthier and tastier!

1-1/2 lbs fresh Green Beans, topped, tailed and cut into 1-2" lengths
1+ lb assorted fresh Mushrooms, chopped or sliced
1-1/2 Onions
2-3 cloves Garlic
Mushroom Powder
Vegetarian Gravy Powder
1-Tbsp Italian Seasoning
1/4 cup slivered Almonds

Preheat the oven to 350F.

Steam the green beans al dente.  Reserve.   Slice 3/4 of an onion into strings, and sauté them with a dab of butter until starting to brown.  Combine the onions and green beans, and reserve.

Dice the other 3/4 onion and sauté it in a pot with the garlic.  Add the mushrooms and continue cooking.  Now add the water, the seasoning and the powders.  Stir until the gravy begins to thicken.

Spoon half of the bean-onion mixture into a 9x9 baking dish.  Top with half of the gravy.  Repeat.  Top the casserole with slivered almonds and bake 20-30 minutes until the almonds brown a bit.  Rest a few minutes before serving.


Favorite Things -- Spice Blends
No raindrops on roses, or whiskers on kittens... but these are a few of my favorite spice things.  I add one or more of these to many, many dishes that I make from breakfast omelets to ultra-fancy dinner entrees and desserts.  Left to Right:

Za'atar
Za'atar is both the herb hyssop, and the name of a spice blend containing that herb.  In this country we mostly see the spice blend unless you hang out in Middle Eastern markets,  The blend usually contains hyssop, sumac, thyme, oregano, cumin, coriander and toasted sesame seeds.  Not a strong taste or flavor, as a blend Za'atar it goes great in egg dishes, on meats and veggies, and various bread doughs.  

Cavender's Greek Seasoning
This is a company secret blend of spices which has been produced in the Ozarks since 1969.  I love Cavender's on almost anything.  Add a good amount of this to ground chicken or pork  to create a pretty tasty home-made Gyro meat filling.   

Sazon Tropicale
My favorite Latin spice blend!  Not hot spicy.  Perfect on popcorn, in omelets, paella, dry-rubbed on chicken or pork.  Add a teaspoon or two to rice while it's cooking to make the best "Spanish Rice" called Aroz Amarillo.  

Everything But The Bagel
The name says it all!  Turn any old slice of buttered toast into a "bagel" any time you want one.

Everglades Seasoning
One of my all time "goes on anything" seasonings!! Everglades Seasoning was first created in 1944 by Mess Sergeant Bill Gerstman who arrived in Saipan to find soldiers of the 714th Rescue Mission so disgusted with eating only mutton and goat that they were dumping their rations into the sea. Gerstman experimented with herbs and spice and came up with a secret recipe that  made the soldiers very happy.  After his tour of duty Gerstman resumed his trade as butcher at the LaBelle Trading Post in LaBelle, FL.   Just a few miles from here!   In 1985 he sold the recipe to Gene and Martha Cross,  owners of the LaBelle Trading Post, who produce the seasoning and several others in Sebring.

Mrs. Dash Chipotle
Mrs Dash was the original no-salt general purpose seasoning!  These days the company makes 18 very interesting no-salt spice blends, plus marinades and rub packets.   I particularly like the Chipotle blend as it has just the right amount of heat and a real taste of the smoked dried jalapenos which are chipotle peppers.

Japanese Seven Spice 
Shichi-mi tōgarashi (唐辛子) is a common ingredient in Japanese cuisine.  The usual seven spices are coarse red chile pepper, white & black sesame seeds, dried orange peel,  ground ginger, hemp seeds and nori seaweed flakes.

Chinese Five Spice (not shown)
A quintessential flavor of  Chinese dishes, Five Spice is made from cinnamon, clove, fennel seed, star anise and Sczechuan peppercorn.

Garam Masala (not shown)
In Hindi, the word Masala means "spice blend" and Garam (hot)  Masala is one of those blends that if you add it to a vegetable dish the diner will automatically say the dish is Indian cuisine.  Cinnamon, mace, cumin and coriander seeds, peppercorns, and cardamon make up the traditional blend.

Butternut Spinach Soup
Got squash.  Got some celery that needed using up and a couple of carrots.  Likewise a bundle of "senior" spinach (not the baby kind) with long stiff stems.  What to do?  What to do? 

Cook it all together!

1 medium Butternut Squash, peeled and chopped or shredded
2 large Carrots, peeled and chopped or shredded
4 sticks Celery, chopped
1 bunch Spinach, sliced into 1/2: strips
Vegetable Base Powder
Mrs Dash Chipotle

I used our SaladMastertm Shredder to reduce the squash and carrots to thin pieces that cook quickly.

Start by saute-ing the celery in a splash of EVOO.  Add the shredded squash and carrots and about 4 cups pf water, and cook for about half an hour, stirring every few minutes to mix things up well.  

Transfer the solids to your food processor and puree in batches if needed.  Return the puree to the liquid in the soup pot.  Add spices to taste and another couple cups of water to get the consistency desired.  Bring to a boil, add the spinach and cook just a couple more minutes.

Pretty -- and pretty tasty too!


Wednesday, November 11, 2020

Skin Up or Down?, Quick Coulis, Crispy Quinoa Treats, Tofu Stuffed Shells, Mushroom Lasagna

 Tofu Stuffed Giant Shells
Sally found a recipe that replaced the usual ricotta or cottage cheese with extra firm tofu.  She had never had tofu, and  this seemed like a good way to introduce her to the food. This is my version of that recipe. 

12 oz box Jumbo Shell pasta
1-2 cups Pasta Sauce of choice
8 0z Extra Firm Tofu
1/2 cup Parmesan cheese
1/4 cup shredded Mozzarella
6 oz package Spinach Dip
3-4 cloves  garlic minced
Herbs and spices of choice to taste  -- I used an Italian Seasoning, plus dashes of basil, oregano, rosemary and thyme.  
Fresh Basil leaves for garnish is a nice touch

Cook the whole box of shells to package directions.  You're only going to use 16-20 of them, but if you've ever cooked Jumbo Shells before, you know that a lot of them will end up broken or otherwise useless.  Keep the cooked but 'not so good' pasta for an application where shape doesn't matter.

Drain/press the tofu if it isn't very dry.  The rough chop it and toss it in your food processor along with the cheeses, spinach dip and spices.  Pulse -- short bursts -- to break up the tofu and mix in the other ingredients.  You do not want a puree here, but you do want a stiff, spoon-able filling.    

What A Great Cheese substitute!!  I actually prefer this to any Ricotta-stuffed shells I've ever eaten.  Sally loves it too.  But after one nibble of plain tofu said "not that way"!  Can't say I blame her, it's pretty tasteless by itself...

Put about a cup of pasta sauce in the bottom of an 8x12 or so baking dish.  Then start filling the shells with a couple tablespoons of the filling, and laying the filled shells in the sauce. 

Once the baking dish is full,  pour more sauce on top of and around the shells.  Top with more shredded mozzarella and some fresh basil leaves.  


Bake in a pre-heated 350F oven for 25-30 minutes.  Serves 4, or makes two dinners and two or three lunches.

Skin-side Up or Down?
If you're going to pan-fry or sear your salmon, which side do you cook first?  Search the 'Net and you'll find the "experts" pretty equally divided between skin-side up first or down first.  Personally, after years of starting skin-side down, I've switched. 

Reason 1 -- I'm not fond of eating salmon skin although other, including Sally are. 
Reason 2 -- Whether I eat the skin or not, starting skin-side up lets me have more control over how crispy the skin is vs how done the whole piece of fish is.  It's like doing a reverse-sear on Filet Mignon; another technique I've adopted with award-winning results.

Technique:  

  1. Season your filets.  I use just a dash of Everglades seasoningtm
  2. Heat (medium high ~ 350F) your skillet (nonstick is best but any will do).  Add a spritz of Canola or Vegetable oil.  Set your slab-o-salmon on the oil -- skin-side UP.  
  3. Do Not move the  fish for at 3-4 minutes.  Let the meat sear and the natural fats release.
  4.  Carefully flip the filet.
  5.  Apply any seasonings to the seared surface of the fish.
  6. Do Not move the fish,
  7.  After 4 minutes, carefully check underneath to see the degree of crisp on the skin.  Want more?  leave it alone for another minute or two (or even 3).  
  8.  Carefully slide your spatula between the skin and the pan, and plate the filet.

While I'm at it, why is it that we seldom see the "cross cut" slice of salmon any more?  Years ago that's how salmon came -- a cross-section cut of the fish about an inch thick, with a piece of backbone in it and a little skin around the edge.    Now all we see are side slabs with acres of skin.

Quickie Citrus Coulis
So... for my Salmon dish, I wanted to serve it with a Blood Orange glaze or couli.  

Nothing on hand, of course, but I didn't want to make -- didn't need -- even half a cup of glaze.  What to do?

Make a mixture of cornstarch and another dry ingredient to keep the cornstarch from clumping, then pour (in my case) the blood orange juice over it and stir to dissolve the powder in the liquid.  For a fruit coulis, sugar is the natural "other dry ingredient", but others would do if you don't want added sweet.

How much cornstarch?  One tsp of cornstarch per cup of liquid you want to thicken.  I juiced out a blood orange and got right at 1/4 cup.  Since the juice was a tad tart, I added 1/4 tsp of cornstarch to 1/4 tsp of sugar, YMMV.  Then poured in my 1/4 cup of juice and stirred.  

I put the mixture in the microwave for 3 minutes.  Thickened nicely, thank you very much!  Your time may vary, of course.

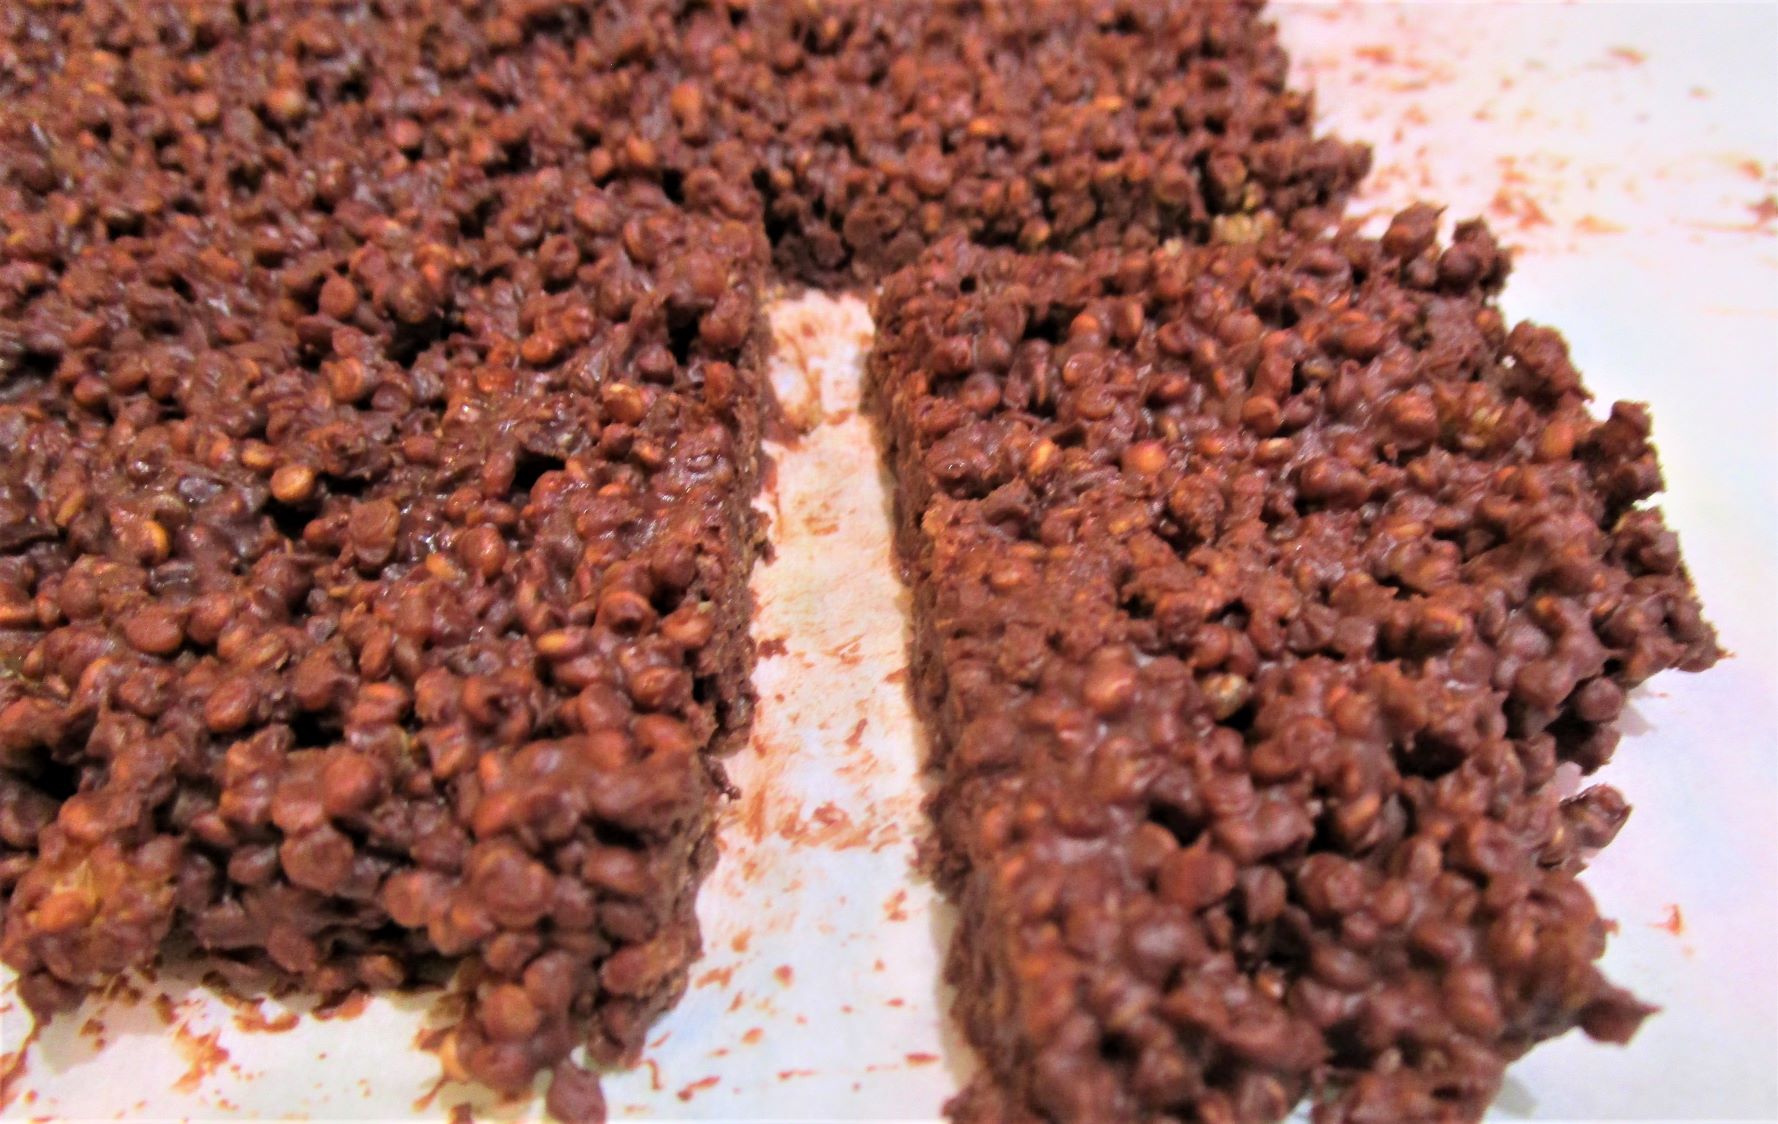
Crispy Quinoa Chocolate Treats
Sally's  Mum brought us this packet of tasty chocolate-quinoa crispy treats, and suggested that I try to replicate them.  I like a good challenge!  Crispy quinoa and tempered chocolate, how hard could it be?

Microwave Crispy Quinoa
First step is to cook up a batch of quinoa.  Don't use quite as much water as the directions suggest.  That way there will be less water that has to leave to make it crispy.  


Make sure it's at least room temperature cool before you continue.  Better even if you let it set uncovered in the fridge over night to dry and cool it thoroughly.  Here you see 1-1/2 cups  (6 ounces) of cooked quinoa spread out in a single layer on an 11x17" baking sheet. 
Fire up your broiler and set a rack in the top third of the oven. Broil the sheet pan of quinoa for 5 minutes.  

Use a spatula to stir the grains around, and broil for another 2 minutes.

If this is dark and crispy enough, great.  Otherwise go for another minute.  Don't let them burn!

Cool and remove to an airtight storage container.  These are also good in salads, topping yogurt or smoothies, and lots of other applications where you want a little crunch.  But I'm going to make crispy chocolate bites.  To do that I need to make:

Microwave Tempered Chocolate
Tempered chocolate is what you need to have to make candies and things that set at room temperature and don't melt into a puddle.  The trick, chemically, is to get the crystals in the chocolate to line up in just the right way.  You can do this with a double-boiler and patience; and that's great for 'mass quantities'.  But I don't need to make gallons of the stuff!!

First off, you gotta use real chocolate -- milk or dark -- with cocoa butter, not some better-living-through-chemistry chocolate colored sweet imitation.  Get the semi-sweet chips, unless you're  hardcore milk chocolate fan.  Check the ingredients for cocoa butter!  You're also going to need a thermometer -- you want at least 88F, but never want the temperature of the chocolate to exceed 93F!

Put 6 oz of chocolate chips in a micr0wave safe bowl.  Nuke them for 30 seconds.  Read the temp and stir.  Repeat.  And again.  Now nuke for 15 seconds.  Then 10 seconds.  You should have a smoothly melted mass of chocolate.  

Make The Treats
To make the Crispy Quinoa Treat, add 6 oz of roasted quinoa to the chocolate, and stir to combine.  Now line a tray or plate with parchment -- you'll want at least a 10x10 area papered.  Dump the quinoa-chocolate mix in the middle of the paper and using a wet spatula, spread and smooth the mixture to a little less than 1/4" thick.  Then pop it in the fridge for an hour or so to cool.  Slice into pieces and try not to eat the whole batch in one sitting!


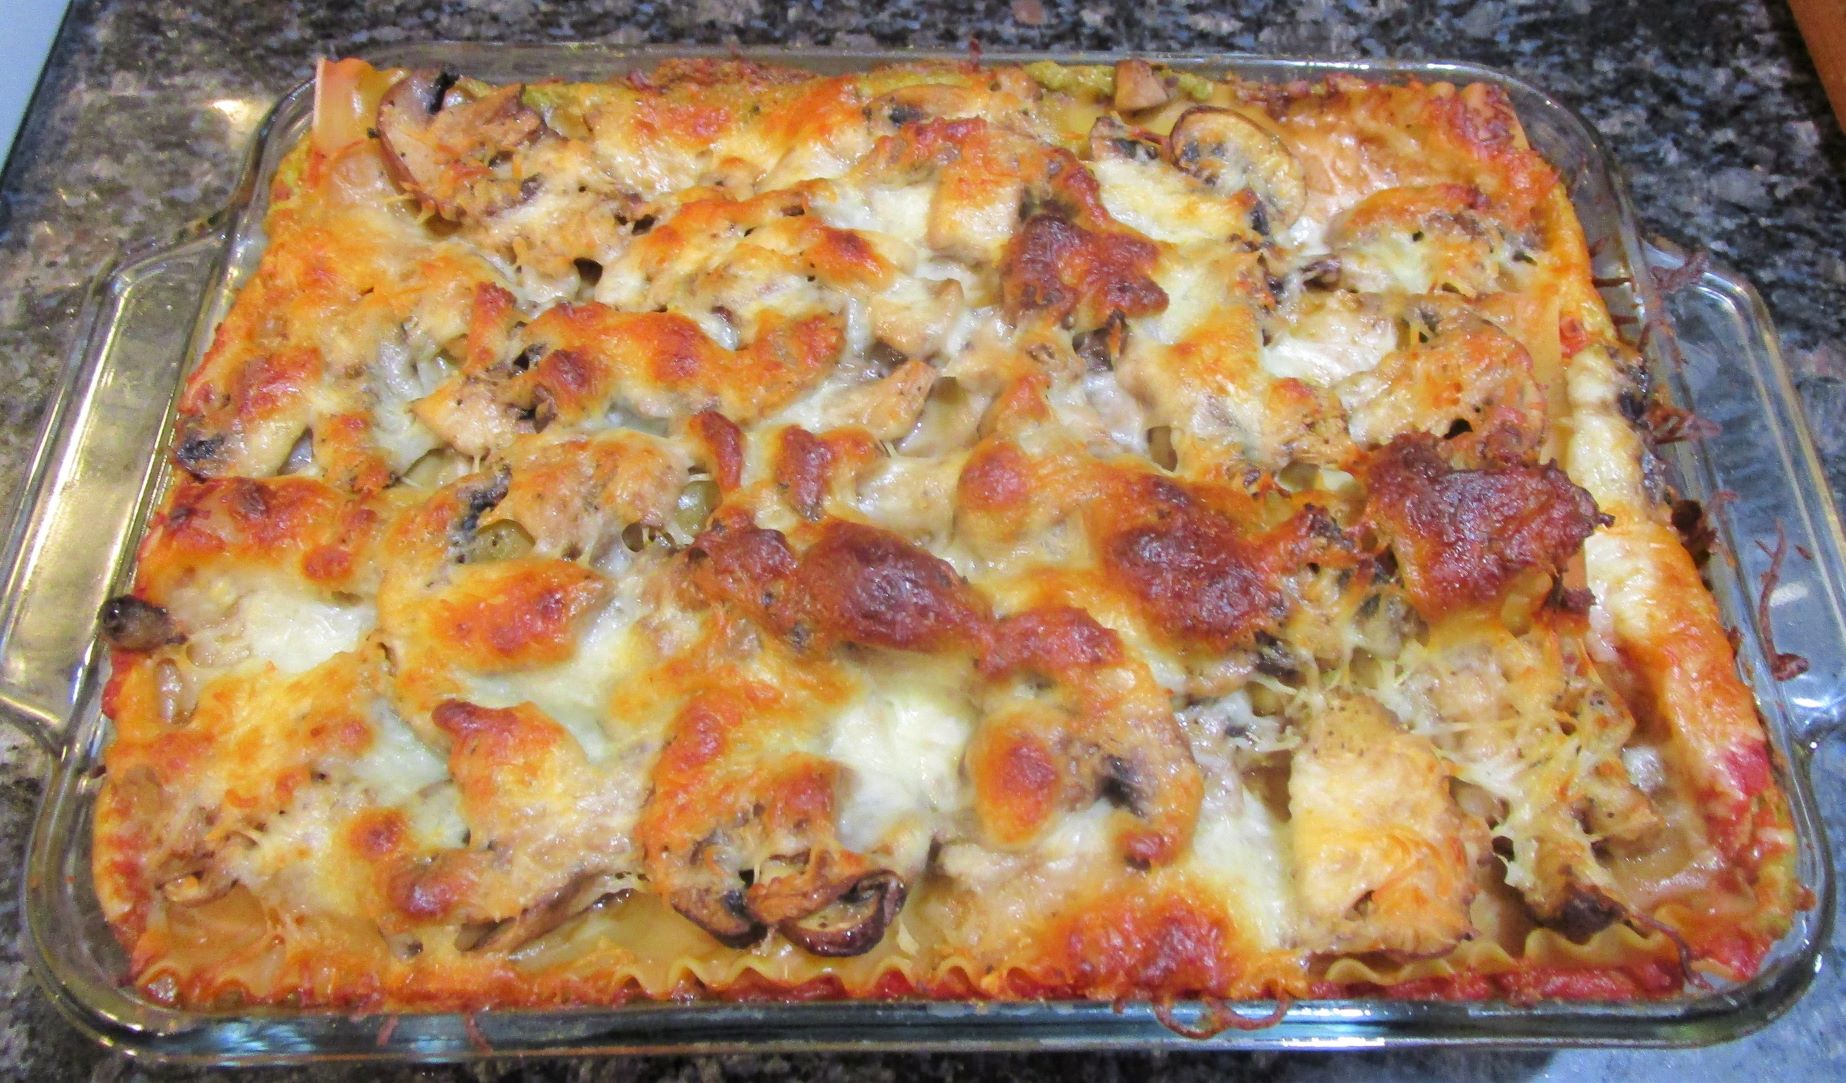
Easy Mushroom Vegetable Lasagna
I needed something for Sunday lunch with Mum that would make leftovers.  Sally suggested a lasagna where I could use up the 'leftover" tofu from the Shells recipe, as the nominal ricotta layer in the strata.  In our Produce box this week, we got a great bundle of assorted 'wild' mushrooms including crimini and oysters.  The light went on -- Mushroom Lasagna!

1 box Lasagna Noodles
8 oz Tofu, cubed
1 lb assorted Mushrooms -- I had crimini, oyster, large white and more
1/2 cup Parmesan
1/4 cup Mozzarella
1/2 cup Skyr yogurt
1/4 cup Spinach dip
1 bag fresh Baby Spinach
Pasta Sauce of choice
30-40 Cherry Tomatoes, halved lengthwise
1 Red Onion, diced
1/2 Red Bell Pepper
1/2 Yellow Bell Pepper
4-5 cloves Garlic
Herbs and spices of choice

Broil the spiced & herbed tomatoes, garlic, peppers and onion just until the tomatoes soften -- about 8 minutes.  Reserve. 

Slice the mushrooms to more or less equally thick/thin pieces, and saute them just a couple minutes in a bit of butter with more herbs. Reserve.

In your food processor combine the tofu, parmesan, m0zzarella, Skyr, and dip.  Process into a ricotta-like spread.  Reserve.

Now it's time to lay down the various layers of this classic strata-dish.  Start with a schmear of pasta sauce in the bottom of your 8x12 or 9x13 baking dish.  Lay down a layer of un-cooked lasagna noodles on top of the sauce.

You know the drill from here.  Layers of "goodies" alternating with layers of pasta.    My sequence (from bottom to top) was: 

broiled veggies
fresh spinach with a splash of pasta sauce
faux ricotta
more veggies
sauted mushrooms 

As you can see, I saved the mushrooms for the top layer and then top dressed that with shredded cheeses.

Pop the whole thing in a preheated 350F oven for 45 minutes.  Check the bake every 15 minutes.  If it starts to get too brown or too dry, cover with a layer of tinfoil.  When baked, rest the lasagna at least 10 minutes before cutting and serving.

The leftovers have been fabulous!!


Tuesday, November 3, 2020

Cathead Biscuits, Portuguese Potato Soup, Fruit Parfaits, Ginger-Orange Carrot Ribbons

Cathead Biscuits
These are an old Southern style biscuit "as big as a cat's head".  Simple to make, simple to bake.

4 cups Self-Rising Flour (or 4 cups AP plus 1 TBSP Baking Powder, 1/2 tsp each Baking Soda and Salt)
2 Tbsp Butter, shortening or lard (about the size of a walnut) at room temp
1 cup Buttermilk (or whole milk plus juice of a lemon, which I prefer)
Pinch of Salt

Pre-heat oven to 400F.

While the oven heats, cut the butter into the flour/salt mix, with a stiff mixing spoon, until you get "coarse crumbs".  Make a well and add the buttermilk while stirring. If necessary, adjust the liquid or flour until the dough comes together in a ball in the bowl.    Divide into 8 pieces.  Roughly ball each piece and place in a greased or sprayed 9" or 10" round pan (7 balls around the outside, last one in the middle).  Push the balls down until they touch more or less.

Bake 20+ minutes until golden on top.  Serve hot with lots of butter.


Caldo Verde Com Camarão
This hearty Portuguese soup features potatoes, greens (collard, spinach or kale), red beans, and sausage, or in this case, shrimp (camarão).  Some versions add sausage, bacon or ham to Caldo Verde, but we're pescetarians, hence the shrimp.

6-8 tsp Vegetable Base 
6-8 cups Water
6-8 Medium Potatoes (Yukon Gold or Red, not 'baking' potatoes)
1 large Sweet Onion, diced
3-4 cloves Garlic, chopped
3-4 cups cooked Red Beans
1 large bunch Kale, Spinach, or Collards, sliced almost julienne thin ~ 3 cups
12+ medium Shrimp -- peeled, tailed an cut into thirds
Salt & White Pepper & Crushed Red Pepper TT

Peel and cube the potatoes.  In your soup pot, sauté the onion and garlic until just tender.  Add the water, vegetable base and spices to taste.  Stir.  Add the potatoes and bring to a boil.  Cook the potatoes 10-20 minutes until very soft.

Mash/puree/blend the potatoes and return to the simmering broth.  You want mashed/pureed potato here, not much in the way of chunks.  Add the beans and continue simmering to heat everything through.

Just before serving, add the greens and shrimp and cook just long enough for the shrimp to turn color before plating and serving.   Alternatively, pre-cook the shrimp Portuguese style with onion and sun-dried tomato and garlic and hot sauce, divide the shrimp into the bowls and pour the soup over.

Garnish with a dollop of yogurt or sour cream if you want.  It's not traditional, but I served my Caldo Verde with the Cathead biscuits, above.

Mixed Fruit Parfait
We've been getting these wonderful Kiwi Berries from our produce Co-op, and just eating them out of hand.  Then we also got some extra special grapes called Candy Dream, and I decided to make dessert parfaits by layering things together with Bird's Custardtm.   

Kiwi Berries
Grapes
Blueberries
Banana
2  cups prepared Custard (for three parfaits)

Make up the custard to package directions and let it cool.  Layer alternating fruits and the custard.  If the custard is too runny, you'll lose the definition of the fruit layers as you see here.

Tastes the same, it's just not quite as pretty as it could be!

Ginger-Orange Carrot Ribbons
I've been making this fabulous side dish for so long, I can't remember where or when I first came across it.  Pre-internet surely...

Carrots
Fresh Ginger
Frozen OJ Concentrate

Peel the carrot(s), and keep peeling until you're tired, or run out of carrots!  I had one nice LARGE carrot!


Chop up a nice large thumb of ginger, don't bother peeling it -- just slice.  Open the can of OJ concentrate.

In a large diameter  covered pan or skillet, lay down a spritz of EVOO and get the heat up to med-hot.    Toss in the carrots, ginger and a couple Tbsp of frozen OJ. 
 

Toss things around with a tongs for a minute, then add about 1/2 cup of water and put the lid on.  You're not braising, or boiling the carrots, it's more like wilting them.  Cook for maybe 8-10 minutes until tender, and serve. 


Monday, October 26, 2020

Asian Cabbage Rolls, Pollo Verde, Falafel, Flour Hummus, Purple Sweet Potato Balls

 Purple Sweet Potato Balls
I promised our Produce Co-op coordinator that I would make "something interesting" with some small but tasty purple sweet potatoes that came in my veggie box this week, and here it is.  Of course you can use any color of sweet potato to make these snack or dessert balls. This is a technique, not a hard and fast recipe.  Feel free to experiment.

Sweet Potatoes, peeled and cubed (they cook faster when cut small)
Honey (1+ Tbsp per pound of potatoes)
Cinnamon (1+ tsp per pound)
Sesame Seeds for coating

Boil, steam or nuke the potatoes until soft and mashable.  I had about half a pound of potato to make the balls pictured here.  Mash them smooth, adding the honey and cinnamon as you do.  You don't want a very 'wet' mash.  Cool.

Roll the mash into balls -- walnut-to-golf ball size depending on how much you love sweet potatoes.  Gently roll each ball in a saucer of sesame seeds.  Serve.

Asian-Style Cabbage Rolls
Someone asked last week if I had a recipe for 'cabbage rolls'.  Even though I'm of half German ancestry, stuffed cabbage or cabbage rolls just weren't in our family cookbook.   Oh, I've eaten my share of cabbage rolls over the years.   I even created a "stuffed cabbage" recipe where you cut the core out of a head of cabbage, stuff the core hole with "German-spiced" ground pork, tied a leaf over the filling and steam the entire head. But this time I got a hankering to experiment with an Asian-inspired cabbage roll.  

Think steamed Spring Rolls -- chūn juăn -- featuring shrimp, rice, and shredded veggies rolled in a blanched Napa cabbage leaf rather than a translucent rice flour wrapper.  Said rolls are then poached to cook the shrimp, before serving.  The following made 16 rolls -- dinner for four with a helping of rice and maybe a side salad or Asian style pickled veg.

Filling & Skins
1/2 lb raw Shrimp, chopped
2/3 cup cooked and cooled short grain Rice
1/8 cup sliced Shallot
1/8 cup thin sliced Red Bell Pepper
1/8 cup shredded Carrot
1/4 tsp grated fresh Ginger
1 Tbsp Soy Sauce
1/2 tsp Toasted Sesame Oil
1/2 tsp Rice Wine Vinegar
1/4 tsp Sriracha
1/2 tsp Japanese Seven Spice blend
1 head Napa Cabbage

Poaching Liquid
2 cups water
1Tbsp Vegetable Base powder
1/8 cup Soy Sauce
1/8 cup Rice Wine Vinegar
1 Tbsp Toasted Sesame Oil

Mix together the filling ingredients and reserve.  Peel off the largest whole cabbage leaves -- you'll need 15 or 16.  Assemble the poaching liquid in a large skillet about 1/4" deep.  I used my Saladmastertm electric skillet, initially set to 150F while I assembled the rolls.

The cabbage leaves need to be blanched so they will roll up without breaking.  You can do this in a large pot/pan of simmering water or broth.  I took the easy way and microwaved three leaves at a time for 1 minute.  

Once blanched, use your chef's knife to thin the butts of the leaves so they will roll up better.  Lay out a leaf, butt towards you.  Put a couple tablespoons of the filling on the butt, and roll up the same way you would a burrito -- bend the end over, then tuck in the sides as you roll towards the tip of the leaf.  

Place each finished roll seam-side down in the warm poaching liquid in your skillet.  When the pan is full, crank the temperature to just barely a boil, cover the skillet, and poach the rolls for 15-20 minutes until the shrimp are cooked.


Remove the rolls and plate.  If you want to be fancy, mix up a cornstarch slurry and thicken the poaching liquid into a sauce to pour over the rolls when you serve them:

Pollo Verde
Sally took a few days vacation and went to visit her daughter Holly up in Alexandria, VA.  So I got to fix some dishes that I love but she doesn't eat, including this chicken and green chilies recipe.  Think Green Chili & Chicken Nachos...  This is really a technique, not a recipe.

Chicken Breast Tenders or pieces
Diced Onion
Diced Green Peppers
1-2 "old" Corn Tortillas
Green Chili Enchilada Sauce or Salsa Verde
Mrs Dash Chipotle Seasoningtm or chili powder of choice
Low Salt Tortilla chips

Saute some diced onion and peppers in a splash of oil.  Then add some chicken pieces (a cut up chicken breast will do) and cook for a couple minutes.  Turn the meat and cook again.  Now add the green chili enchilada sauce, Mrs. Dash Chipotle or another chili powder, and the ripped up tortillas.  

Thin the sauce out and poach the chicken for a few minutes until cooked through and the tortillas have basically dissolved.  Serve  al nacho on a bed of crispy tortilla chips.

Falafel
Our friends Susan and Patrick have socially-distanced to their mountain home in North Carolina, but Patrick was back in town for a few days for his work.  So while the women were out of town he and I had a Guy's Night dinner of falafel.  Because Patrick is sodium-intolerant, I made these falafel without any salt, and they were great.  But if you just gotta have it, add a teaspoon of salt to the following:

1 cup Chickpea Flour
1/2 tsp Salt
1/4 tsp Baking Soda
1/2 cup chopped fresh Parsley
1/4 cup chopped fresh Dill
1/2 tsp Cumin
1/4 tsp Coriander
1/2 tsp Garlic Granules
1/4 tsp Onion Powder
2 tsp Lemon Juice
1/2 cup Water (hot)
Oil for frying

For serving:
Pita Breads
Homemade Hummus
Homemade Raita or Tzatziki Sauce (yoghurt with herbs, garlic, cucumber and more)
Diced Tomato
Sliced Cucumber

How simple is this?  Mix together the ingredients.  Use a spoon to make small fritters, and fry in a bit of vegetable oil until brown and crispy.

Serve on a pita, with accompaniments.

Creamy Garbanzo Flour Hummus
Homemade falafel just seemed to cry out for homemade hummus, as you can see in the photo just above. 

What's a little more garbanzo flour, anyway!  Yes, that's right -- flour.  Not pureed canned or otherwise cooked beans unless you like chunky hummus (we don't).    This makes 4-6 large servings.  This recipe is salt free.

1/2 cup Garbanzo Flour
1 Tbsp powdered Vegetable Base
1-1/2 cups Water
1/2 tsp Cumin
1/8 tsp White Pepper
1 Tbsp creamy Peanut Butter
2 Tbsp Lemon Juice
1/4 cup minced Shallot
1/8 cup toasted Pine Nuts

Bring the water to a boil.  Add the flour and vegetable base, and stir.  Reduce the heat to medium-low and continue stirring as you add the lemon juice, spices, peanut butter and shallot.  Remove from the heat and fold in the pine nuts.  Adjust the spices and consistency if you need to.  Too thin?  Stir in a tablespoon of garbanzo flour to tighten it up.    Too thick?  Stir in a bit of broth or water.  Remove to a serving bowl and cool.  Serve with falafel or pita crisps, or just schmear on a toasted pita.